

Table of Contents [hide]
Basements are unforgiving. The right epoxy resin flooring contractors help seal dusty concrete, control moisture, and deliver a clean, durable surface that stands up to daily use. This guide shows what to ask for, what it should cost, and why prep is the deal-maker.
You’ll see how moisture testing drives every choice, why surface profile matters more than product hype, and where epoxy flooring beats other options. Use the cost notes and checklist to compare quotes fairly.
At-a-Glance: Basement Epoxy Resin Flooring
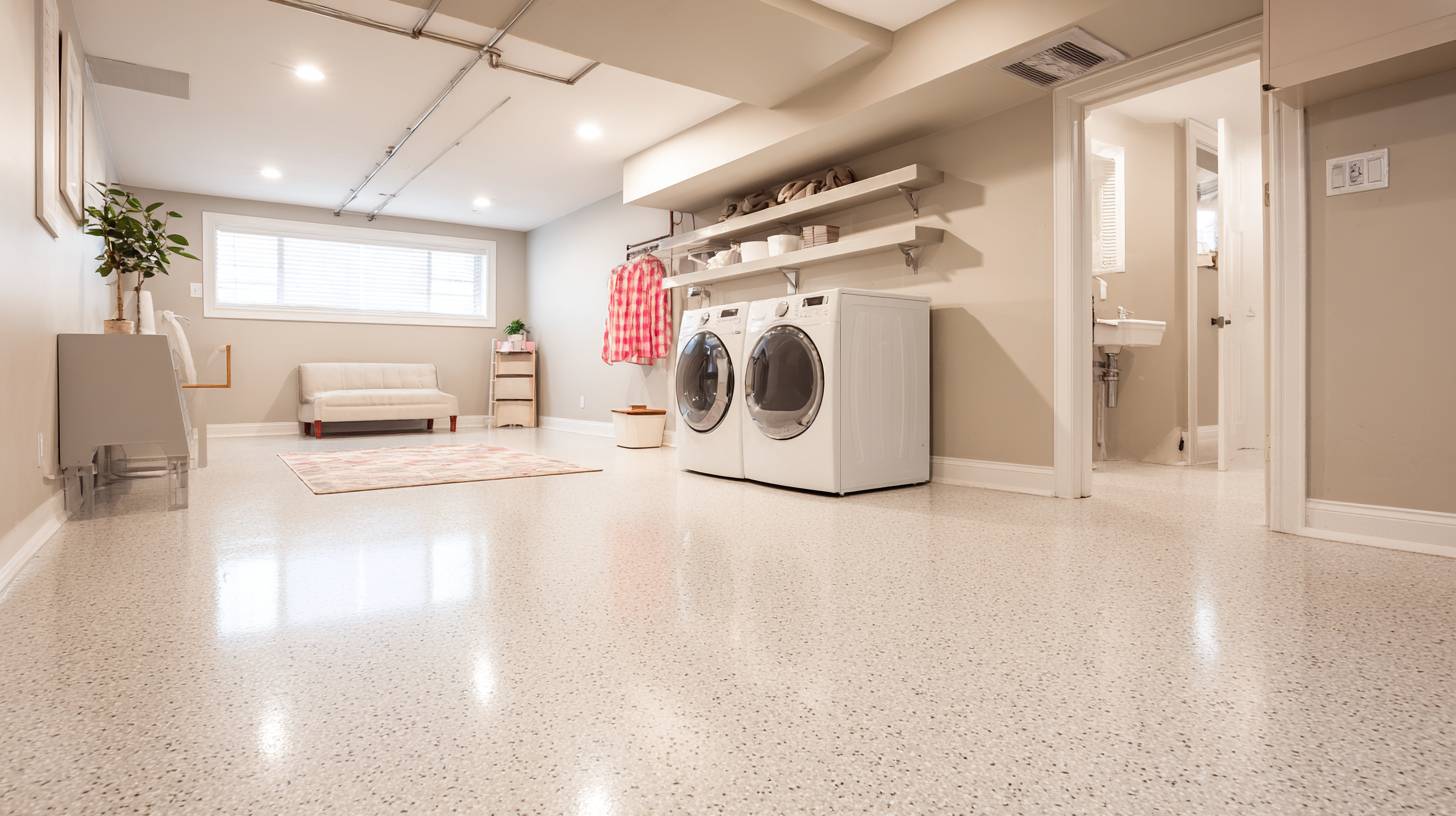
Seamless resinous floors stack primer, build coats, and a topcoat over concrete floors. Benefits include dust control, stain resistance, abrasion resistance, easy cleaning, and a brighter room.
Looks range from flake broadcast (matte to satin) to metallic epoxy (a high-gloss finish) to solid color. Success depends on moisture testing and the correct surface profile; epoxy chemistry helps, but prep decides.
Typical installed costs (materials + labor)
- Thin-mil primer/sealer: $3 to $7/ft² (materials $1 to $3, labor $2 to $4)
- Flake broadcast + UV-stable topcoat: $5 to $12/ft² (materials $2.50 to $5, labor $2.50 to $7)
- High-build 100%-solids (2 to 3 coats): $6 to $13/ft² (materials $3 to $6, labor $3 to $7)
- Metallic decorative: $8 to $15/ft² (materials $4 to $8, labor $4 to $7)
- Moisture mitigation primer, if required: + $2 to $4/ft². Concrete patching and crack work: + $1 to $3/ft².
Epoxy resin moved from industrial facilities and other industrial environments into homes as installers adapted the same surface prep and coating sequences for basements and garages. Contractors who understand that lineage know why standards, testing, and build thickness matter.
Why Basements Are Different
Below-grade slabs see capillary moisture, temperature swings, and occasional leaks. Traffic includes storage, home gyms, and workshops, so point loads and abrasion exceed main-floor rooms. Epoxy flooring lasts longer than paint or mats because it builds film thickness and resists chemicals when moisture is managed.
Why is it the way it is?
Many mid-century and earlier slabs lacked continuous vapor retarders. Modern codes improved control, but every slab still needs testing before coatings. That history explains why contractors specify moisture testing and mitigation first.
Moisture Testing Workflow (Non-Negotiable)
- Measure in-slab relative humidity (ASTM F2170) and/or moisture vapor emission rate (ASTM F1869); record pH.
- Compare numbers to limits for two-part epoxy coatings or water-based coatings.
- If readings exceed spec, plan moisture mitigation with a vapor-tolerant primer before build coats.
- Document test locations and results for warranty files.
Standards Referenced (Moisture & Safety)
- ASTM F710 (substrate prep; vapor retarder note) and ICRI 310.2R (Concrete Surface Profile).
- ANSI A326.3 (slip-resistance testing guidance).
- Ventilation per ASHRAE 62.2; safety and PPE per OSHA; EPA architectural-coatings VOC compliance.
- Check HOA or building rules and verify local approvals.
Moisture Mitigation Options (What Contractors Use)
- Epoxy moisture-vapor primers for elevated RH; joint and crack detailing to block pathways.
- Chemistry trade-offs: 100%-solids (lower VOC, thicker build) versus water-borne (lower odor, thinner build).
- Topcoat technology (aliphatic urethane or polyaspartic) for UV stability, chemical resistance, and faster return to service.
- Cold regions need longer cure times; hot-humid regions may warrant mitigation even at borderline readings.
Added cost note
Mitigation steps typically add $2 to $4/ft² materials and labor. Extra joint repairs and slab leveling raise labor hours.
System Options for Basements (Good / Better / Best)
- Good: thin-mil primer/sealer for light duty; lowest cost.
- Better: flake broadcast with UV-stable topcoat; hides imperfections and adds traction.
- Best: high-build 100%-solids epoxy resin flooring; multiple coats for impact and chemical resistance.
- Decorative path: metallic epoxy flooring; add micro-texture or a satin topcoat in wet areas.
These floor systems mirror long-running industrial flooring sequences, such as primer, build, broadcast, and topcoat, adapted for homes. The method persists because it works.
Flake vs. Metallic vs. High-Build (How to Pick)
- Aesthetics: Flake is forgiving; metallic is a showpiece; solid is clean and modern.
- Performance: High-build is toughest; flake systems are strong on abrasion resistance and spot repairs.
- Safety: Add silica or quartz broadcast near entries and laundry zones to meet traction goals.
- Costs: Metallic finishes carry higher labor costs for installation techniques and layout; high-build uses more materials.
Prep & Installation Techniques (Where Projects Succeed or Fail)
Remove oils, paints, and curing compounds; then profile to the ICRI CSP target using a shot blast machine or a diamond grinding wheel. Epoxy concrete coatings bond only to clean, sound concrete, such as repairing spalls, routing and filling cracks, and honing joints.
Match primer to moisture data. Monitor slab and air temperature and dew point. Stage materials and use a dust-managed workflow for uniform results.
Installation Day: Ventilation, Safety, Compliance
Set ventilation to meet ASHRAE 62.2 and manage odors. Follow OSHA safety guidelines and EPA VOC rules. In multi-unit buildings, plan elevator access, work-hour limits, and protection for adjacent finishes.
Follow the manufacturer's application instructions and recoat the windows. On many basement jobs, labor is 40% to 60% the total cost, rising with heavy prep or tight logistics.
Cost Ranges & Regional Modifiers (What Drives Price)
Line items include prep hours, crack and joint repairs, build-coat thickness (mils), topcoat technology, and stairs or thresholds. National ranges vary by system and scope (repair/retrofit versus full system).
Coastal and urban projects often run higher due to wages and access; inland suburban and rural work can be lower. Moisture mitigation and accelerated schedules are the big swing factors.
Maintenance Plan at 1–3–5 Years (Long-Term Care)
Control grit with mats, dust mop often, and use a neutral-pH cleaner. Each year, check for gloss loss, scratches, or whitening and schedule a re-topcoat in high-traffic lanes. Flake systems allow easy spot repairs. Metallic finishes keep their look with gentle cleaners and furniture pads. Avoid harsh solvents; confirm cleaner compatibility with your topcoat.
When Epoxy Isn’t the Right Fit (Smart Alternatives)
Persistent vapor, hydrostatic pressure, severe slab movement, or deep contamination can rule out coatings. Consider polished concrete or concrete polishing with densifier and guard, modular tiles, or hybrid concrete coatings. Compare traction, reflectance, downtime, and lifecycle cost to the epoxy floor you specified.
Buying Checklist
Apples-to-apples scope: ICRI CSP target, documented RH and MVER, build thickness, broadcast type and size, traction plan, recoat and cure times, and cleanup and disposal.
Quality signals: references, testing logs, experienced crews, on-site supervision, and clear warranty terms tied to standards.
FAQ
How fast can we use the basement?
Light foot traffic in 12 to 24 hours; heavier use in 48 to 72 hours, depending on chemistry and temperature.
Will the floor be slippery?
Ask for texture or quartz in wet zones and verify slip targets with ANSI A326.3 guidance.
Can epoxy handle humidity?
Yes, when testing and mitigation are done. A vapor-tolerant primer and joint detailing help manage emissions.
Do we need permits?
Coatings rarely need a building permit, but installers should meet ventilation, safety, and VOC rules.
Talk With Epoxy Resin Flooring Contractors
Ready to compare options for your basement? Mr Remodel connects you with vetted epoxy resin flooring contractors. Share square footage, slab condition, and moisture data to request a quote. You’ll get high-performance floor systems, clear pricing, and a maintenance plan that fits your climate and budget.


